Wednesday 27 February 2013

Pastry


Bear with me while I post this recipe. Like my vanilla ice cream post I just want to have it up here by itself so I can find it easily without having to sift through multiple other steps of more complicated recipes (like the one I'm going to post next). So yes, this post is really just for my benefit (and yours too if you want. I guess I can share).

Recipe from the back of the Tenderflake box.

Makes shells for 3 complete pies with tops and bottoms

Ingredients

5 1/2 C. Flour
2 Tsp. Salt
1 lb Tenderflake Lard
1 Egg
1 Tbsp. Vinegar
Up to 1 C. Water

Directions

~Stir together flour and salt
~Cut in the lard until you get pea sized pieces
~In a measuring cup whisk the egg, add in the vinegar and top up with cold water to a total of 1 C.
~Stir the water mixture into flour mixture, adding a bit at a time and only add enough to make the dough cling together
~Gather dough into balls (6 balls - makes 3 top and bottom pies)
~Dough can be refrigerated if not ready to be used right away (just pull out at least 30 min. before rolling) - don't roll dough until you are ready for it at the end as it won't come off of the counter once it is left for awhile and warms up.
~Roll dough out on a well floured surface.
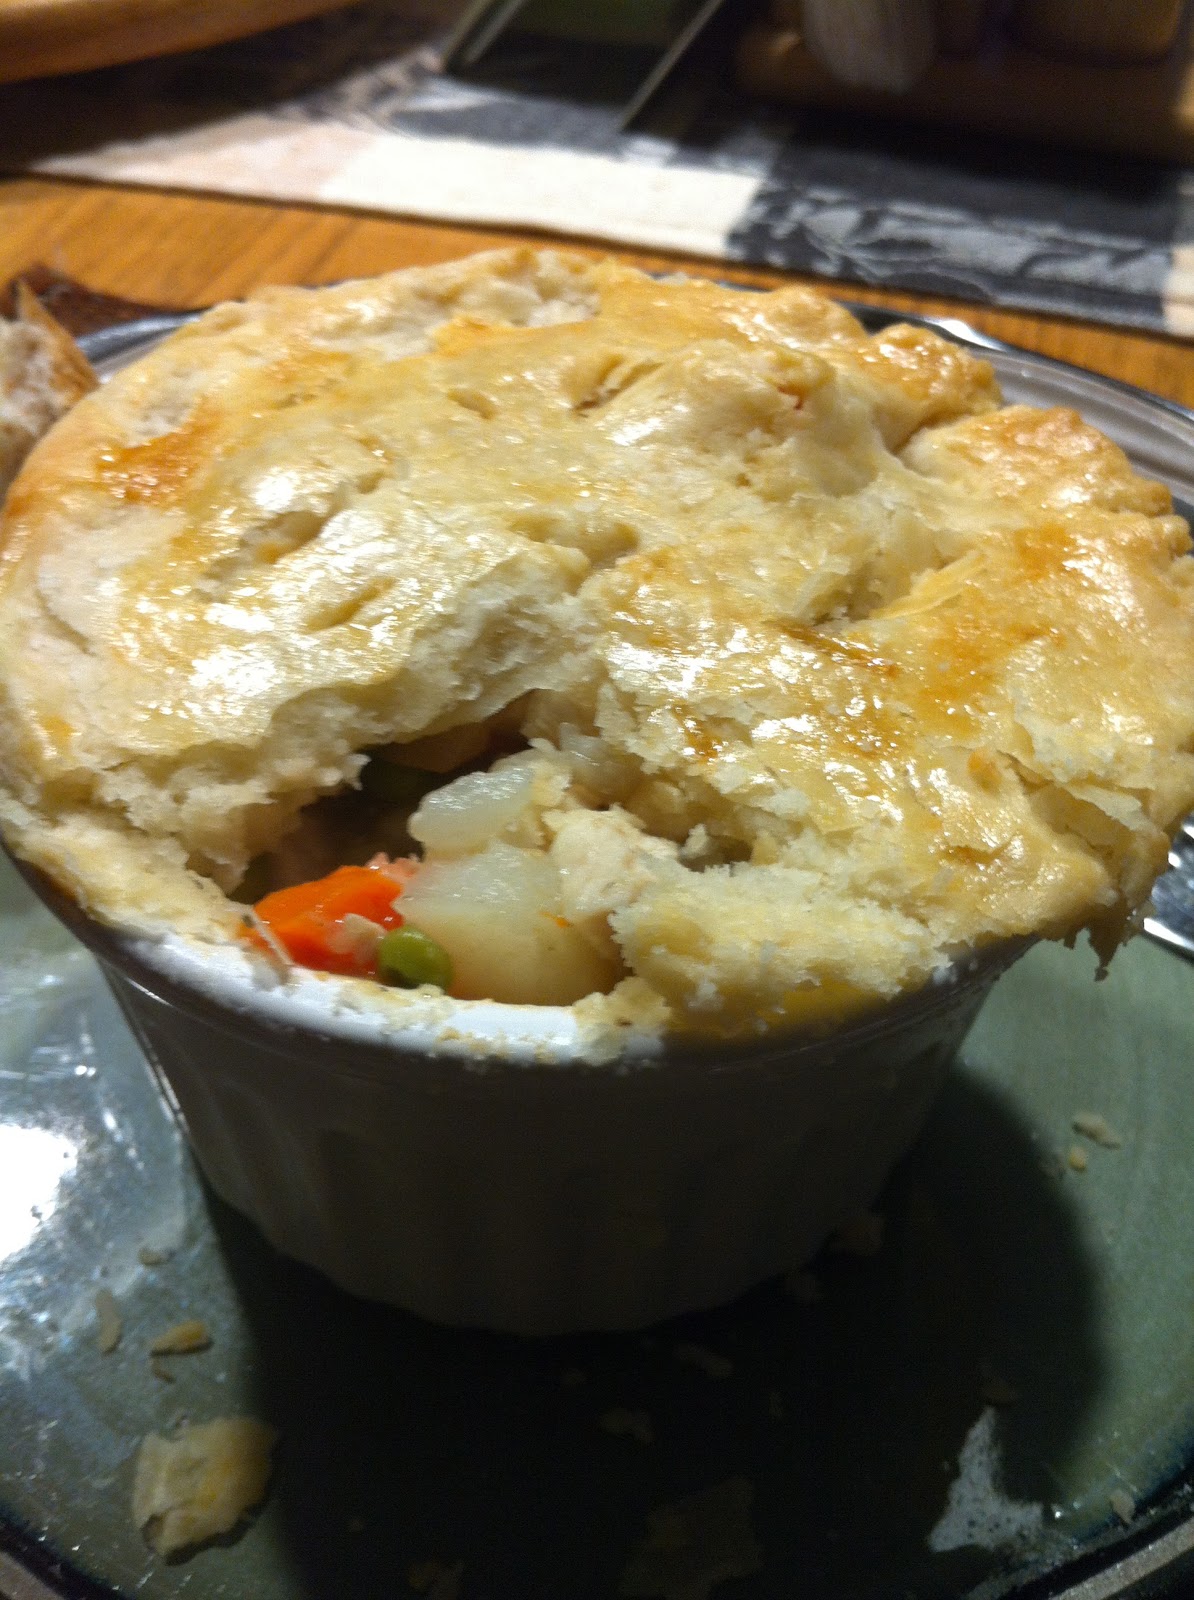
~Then do with it whatever pastry creation you have in mind.

Tuesday 26 February 2013

Toll House Cookies


This was my go-to recipe for chocolate chip cookies from the very beginning. I guess you could say it was where my love of baking really began. I'd spent a lot of time leafing through our cookie cookbook searching for the next great thing to make (if only I had known about food blogs then), but I always seemed to find my way back to page 92, nine times out of ten. Even though I haven't made these in probably a year, I did not forget page 92 when I opened up the book this time. I made this recipe for years almost exclusively before I ever knew what a food blog was. Then I kinda got bored of it (too much of a good thing) and started to search elsewhere for a good recipe. Until discovering food blogs I never found one that I liked as much. Since beginning this blog (and getting my KA mixer) I haven't made these cookies. I made other ones and a few recipes I swore hands down were better. More flavour, more chewy, you get the picture. Well I take it all back. Ever since getting our new oven, the two recipes that as of late I would say were the best cookies really haven't been cooking up well. So I decided to go back to my good old faithful Toll House recipe, a recipe I have yet to make in my mixer. Actually I think I tried making this in my first mixer (the one that broke and was way, way, way too small for me), but I don't count that because the mixer didn't get to work it's magic on the ingredients. But my new mixer...I'll say it again, you never know what creaming butter and sugar truly means until you make cookies in a stand mixer. The hand held mixer just doesn't even come close.

So back to the results of the cookies. They were amazing. I ate some warm and they were the gooiest things I'd ever eaten, they fell apart in my hands. But the dough before baking was amazing. It was silky and light and fluffy (basically whipped is the word to describe it), instead of thick and chunky like my other recipes have been, probably due to their being quite a bit more butter and eggs in this recipe than others (and you bake at 375 vs. 350 so really it is a significant difference from other recipes). So the end result was that these cookies probably tasted close to the same as the recipe I remembered but the texture was so much better. I feel like I've found a whole new cookie recipe. The only think about these cookies was they went pretty flat and almost concave (something I've never really experience with this recipe or other cookie recipes seeing as I usually opt for a chewy and thick cookie recipe), and typically I associate flat cookies with crispy cookies. But as long as you watch your baking time (for my liking, 8 minutes and not a second more was perfect), these cookies are anything but crispy. When the family bit into the first cookie it was asked what recipe it was. When I responded they said they could tell. I guess there's nothing like the original chocolate chip cookie recipe.

One final interesting thing. I was just searching this recipe online (as I got my copy from one of the only recipe books I refer back to time and time again), and found that I really cut back on the chocolate. The recipe in my book is identical to the one on the Nestle website, except mine calls for 1 pkg of Nestle chips and the web version calls for 2 cups. I didn't really know how many cups was in a package so I started by the half cup full and counted up and it looked good at 1 1/2 cups. But I can see why they called for 2. Some of my cookies were amazingly chocolate-filled and others had very little (simply because I had made a double batch and my mixer was pretty close to capacity and wasn't distributing the chocolate quite as well as it should have), so take your pick on the amount of chocolate. 1 1/2 may be enough if you're just making a single batch and you can mix the chocolate in evenly.

Recipe is the Original Nestle Toll House Recipe, from Cookies! A Cookie Lover's Collection.

Makes 4 1/2 dozen medium-large cookies (it's a much larger recipe than other recipes out there).

Can you tell how light and fluffy it is?

Ingredients

1 C. Butter, softened
3/4 C. White Sugar
3/4 C. Brown Sugar
1 Tsp. Vanilla
2 Eggs
2 1/4 C. Flour
1 Tsp. Baking Soda
1 Tsp. Salt
1 1/2 - 2 C. Chocolate Chips
1 C. Chopped Nuts (optional - I've never put these in)

Directions

~Preheat oven to 375
~In a large mixing bowl cream butter, sugars and vanilla. Add in the egg and mix.
~Mix in flour, soda and salt until light and fluffy.
~Stir in chips and nuts if desired.
~Using two spoons, scoop onto cookie sheets (handle as little as possible with your hands, it doesn't matter what the dough looks like on the pan - it doesn't have to be a perfectly shaped ball)
~Bake for 8-9 minutes or until edges are golden and centre still is white and soft.

Enjoy (warm)!


Monday 25 February 2013

The Non-Balled, Cheese Ball


AKA The Best Tasting, & Easiest Cheeseball Out There!

This thing is amazing. Once you start eating it you just can't stop. Seriously, what's better than garlic and cheese together? Umm, nothing. So, you could theoretically roll this mixture once made into a ball like you would for any normal cheese ball, but we get lazy and just throw it into a bowl and scoop it out with a knife (or by the spoonful if we're too lazy to search for a non-stale box of crackers). I've been thinking lately though that this may be pretty darned good spread on a toasted bagel. After all you put cream cheese on a bagel, and this recipe is just a souped up cream cheese. I was also one night wanting something to put on my baked potato but I didn't feel like making garlic butter or grating some cheese so I just put a scoop of this stuff inside the potato and let it melt and it was again amazing. Garlic and cheese, need I say more? I'm also just being reminded that this was also scooped onto steamed veggies and allowed to melt and was a simple cheese sauce.

There is a lot of fancy cheese ball recipes out there that call for expensive and fancy ingredients. This one calls for some pretty basic ingredients and very little work, and it tastes a million times better than any cheese ball I've ever tasted, and as you can see it's pretty versatile. We typically only make it at Christmas, but this year we bought a two pack of the Imperial Cheese so we had one spare for later.

Recipe (or ingredients list with no directions or quantities) comes from one of the ladies my mom worked with.

Ingredients


1 Pkg. Imperial Cheddar Cheese
Equal Part Soft Cream Cheese
4 Cloves Garlic, minced
1/2 Tbsp. Worcestershire Sauce

Directions

~Combine all ingredients in the bowl of an electric mixer and mix until all ingredients are combined and mixture is fluffy.
~Allow to rest in fridge for at least half an hour (if you can)!

Enjoy

Sunday 24 February 2013

Chicken Pot Pies (Dairy Free)


These were quite a bit of work because we had nothing prepared ahead of time and we made the pastry from scratch. You could buy some pre made pastry sheets or use some leftover chicken and veggies from the previous nights dinner to take out a few of these steps. But, the homemade pastry was so worth it. It may not have been pretty (I've only ever made pastry one other time and that was years ago) but it was so incredibly flakey and delicious. I've not ever been a pie lover, it's something I'll eat but it's typically not the first (or second) thing I'd pick for dessert, but I now know why. When the pastry tastes like this, pie is so worth eating.

Pastry recipe is the one off the Tenderflake box.

Makes 5 individual ramekins and 1 regular sized pie

Ingredients

1/2 Recipe of Pastry
             5 1/2 C. Flour
             2 Tsp. Salt
             1 lb Tenderflake Lard
             1 Egg
             1 Tbsp. Vinegar
             Up to 1 C. Water

6 Chicken Breasts
Salt
Pepper
1/2 Tsp Poultry Seasoning

3 Carrots, peeled and diced
4 Medium Potatoes, peeled and diced
1 1/2 C. Frozen Peas

1 Tbsp. Butter
1 Large Onion, diced
4 Cloves Garlic, minced
5 C. Chicken Broth
5 Tbsp. Flour
1 Tsp. Salt
Pepper
1 Tsp. Poultry Seasoning

1 Egg

Directions

~Make pastry
        ~Stir together flour and salt
        ~Cut in the lard until you get pea sized pieces
        ~In a measuring cup whisk the egg, add in the vinegar and top up with cold water to a total of 1 C.
        ~Stir the water mixture into flour mixture, adding a bit at a time and only add enough to make the dough cling together
        ~Gather dough into balls.
        ~Dough can be refrigerated if not ready to be used right away (just pull out at least 30 min. before rolling) - don't roll dough until you are ready for it at the end as it won't come off of the counter once it is left for awhile and warms up
        ~You'll only need about half of this recipe, so reserve the rest in the fridge or freezer for later projects.


~Season chicken breasts with salt, pepper and seasoning and bake in oven until almost cooked entirely. 
~Allow chicken to cool slightly and cut into cubes.
~Cut carrots & potatoes. Place carrots and peas in one pot and potatoes in another and cook until tender. Drain.
~In a large saucepan melt the butter and saute the onions until golden on medium-high. Near the end, add in the garlic and cook.
~Add in 4 cups of the chicken broth, reserving the remaining 1 cup, stir and lower temperature to medium.
~Pour the 1 cup of broth into a mug and whisk in the flour 1 tbsp at a time until all lumps are gone. Add into the saucepan, whisking constantly.
~Season with poultry seasoning and continue to whisk until mixture thickens. Remove from heat.
~Preheat oven to 425 F
~Grease the dishes.
~In a large bowl combine chicken cubes, carrots, peas & potatoes. Pour in the sauce and mix to distribute.
~Scoop mixture into dishes.
~Coat top lip of dish with a bit of egg wash.
~Roll out pastry on a floured surface and lay over top of each mixture filled dish. Trim edges and press to seal around edges.
~Brush top of pasty with egg.
~Bake for 40-45 minutes or until pastry is golden.

Enjoy


Wednesday 20 February 2013

Fudge Brownie Ripple Ice Cream - 100th Post!!


My 100th Post!!


I remember when I couldn't believe I had two pages of posts. With seven entries displaying per page, it was a big deal for me to have to click to see older posts. I didn't know how I was going to do it then, and I still really don't know how I'm doing it now. All I know is that my motives haven't really changed. 100 posts in and I'm not trying to get everyone and their dog reading my blog. A few people are great, but I really don't want to dedicate the time to having thousands of hits a week. I'm happy with the pictures I have, they show what the dish is. Sure they aren't the prettiest or have the best lighting or whatever but they do the job. At the end of the day I enjoy it. I have fun making new things and searching for new recipes, and I realize I have a lot to say about the adventures that go into making each dish. This blog has done it's job though as it is a place to store things I have made and my notes on what worked and what didn't and I can honestly say that I enjoy referencing back to a recipe that is written up by me. It follows a procedure for how my brain works and my kitchen and equipment operate. And really, that's enough for me.

Now I know it's kinda cold out for ice cream (but we are going through a pretty mild spell here), but one of the ladies I work with just got back from Hawaii and she kept raving about these milkshakes she had that she was sure were made with homemade ice cream, etc. So I left work and headed to the store to buy cream. I was making ice cream in February, even if I had to eat it wrapped in a blanket. The plan started out with making brownie batter ice cream, but as I was sitting in the grocery store parking lot on my phone trying to find a recipe I knew I had seen before, I decided to go in a different direction because I have to be honest, I'm not much of a chocolate ice cream fan. It's kinda like blueberries and strawberries. I love the real thing, but don't you dare put them as an ice cream base.

Ice cream is a fair bit of work and it takes a bit of time but it's fun to make. The only problem is that there is two smells guaranteed to turn my stomach and that is warm milk and eggs cooking. Unfortunately, those two smells combined don't make it smell any better and it took a long time for the custard to cook so I was all too familiar with the smells. It amazes me though that something that smells so bad (in my opinion) while it's cooking can taste so amazing after it cools. It's magic.

The fudge sauce is not as bitter as the chocolate sauce I made recently which is a good thing in my eyes.

Fudge Ripple recipe is displayed on epicurous.com, but is actually from David Lebovitz's The Perfect Scoop. 


Ingredients

Fudge Ripple
1/2 C. Sugar
6 Tbsp. Cocoa
1/3 C. Light Corn Syrup
1/2 C. Water
1/2 Tsp. Vanilla

1 Batch Vanilla Ice Cream
2 1/2 C. Brownies, cubed & frozen

Directions

Fudge Ripple
~In a small saucepan mix sugar and cocoa. Add in corn syrup and water and heat until it reaches a boil, stirring constantly.
~Allow it to bubble and thicken for about a minute then remove from heat and add vanilla. Stir.
~Place in fridge to cool completely before adding to ice cream.

Ice Cream
~Make ice cream custard, when cool freeze in ice cream maker

Ice Cream Assembly
~In container place a layer of vanilla ice cream. Top with a generous drizzle of fudge (don't mix it in).
~Place layer of ice cream on top. Topped with brownie cubes.
~Repeat layers until you run out of ingredients.
~Finish the top with a drizzle of fudge and gently swirl it in to the top layer of ice cream.
~Sprinkle the edges with some crumbled bits of brownie.
~Place ice cream in freezer to set.

Enjoy


Tuesday 19 February 2013

Vanilla Ice Cream


I've posted this recipe before as part of my Blueberry Swirl Ice Cream, but I just wanted to post it again by itself because I know I'm going to be referencing back to it in the future many times as it was so good and will probably be my base for most ice cream recipes I try. So bear with me, because the next post is going to be so, so worth it. Even the 'chocolate disliker' said yum!

Recipe is David Lebovitz's

Ingredients

1 C. 2% Milk (for very creamy ice cream, use half-and-half)
Pinch of Salt
3/4 C. Sugar
2 C. Heavy Cream
5 Egg Yolks
2 Tbsp. Vanilla

Directions

~In a medium saucepan, heat the 2% milk, salt & sugar.
~In a bowl, whisk together the egg yolks.
~Pour about half of the warmed cream mixture into the yolks, whisking constantly
~Place yolk & cream mixture back into the saucepan.
~Cook over med-low heat, while stirring constantly & scrapping the bottom of the pan with a spatula.
~When the mixture thickens and coats the spatula, strain the mixture through a sieve into a large bowl.
~Add in the cream & vanilla. Stir
~Refrigerate mixture to chill thoroughly.
~Place cold custard into ice cream maker and freeze according to manufacturer's directions.
~Place ice cream into a container and put in freezer to freeze completely.

Enjoy

Monday 18 February 2013

Cheeseburger Sloppy Joe (Tomato-Free)


Forgive me for what I'm about to do. I'm going to share a Sloppy Joe Recipe that is a little bit different. It has no ketchup and no tomato paste. Gasp! You'll survive, and you'll like it trust me. After looking at a few different recipes I came to the conclusion that the ketchup in the recipes was used as an ingredient to make a sort of BBQ Sauce, as it is mixed with spices and mustard, etc. And the tomato paste appeared to be a thickener. So, I cut straight to the chase and just added BBQ Sauce, and thickened it with flour and it worked beautifully.

The reason for calling it Cheeseburger Sloppy Joe (even though we didn't actually put any cheese on it at all - but you could and I'm sure it would be amazing) is because as it was simmering it smelled just like the smells I associate with hamburgers. Red meat, BBQ sauce, onions, mustard & spices. I think it was mainly the BBQ sauce & mustard combo that did it though. But, when you tasted it, it actually tasted nothing like it smelled which for me was a good thing because we just had had hamburgers the night before and I wanted something different and it was. I'm sure we'll be making this again which excites me because up until this point I have never eaten a sloppy joe.

Recipe adapted from Kayotic Kitchen.

Serves 6-8

Ingredients

2 lb ground meat

Salt
Pepper
1 Large Onion, diced
1 Green Pepper, diced
3 Cloves Garlic, minced
1 Can Sliced Mushrooms, drained
1/4 C. Yellow Mustard
1/3 C. BBQ Sauce
1 Tbsp. Brown Sugar
Dash or Two Tabasco
1 1/2 Tsp. Worcestershire Sauce
1 Tsp. Oregano
1/2 Tsp. Cumin
1/2 Tsp. Paprika
1/4 Tsp. Chili Powder
1 C. Water
1-2 Tbsp. Flour
Buns
Butter

Directions

~In a large skillet season meat with salt and pepper to taste and brown
~Add in the onions & peppers and cook until veggies have softened and meat is cooked
~Add in the garlic and stir just until cooked.
~Add in the mushrooms. Stir
~Reduce heat to a simmer and add in mustard, BBQ sauce, sugar, tabasco, worcestershire and spices. Stir to mix.
~Add about half of the water. Stir. If sauce is looking watered down, whisk flour into remaining water and add mixture to skillet. Stir. (Really just play it by ear. The moisture content is really going to depend on your cut / type of meat so if it's too runny add less water / more flour, and if it's not saucy enough add some more mustard / BBQ sauce / water. Find your happy medium.)
~Simmer for 15-20 minutes.
~Butter the buns and warm them in the oven until butter has melted (don't let the buns go crispy, just want them warmed)
~Scoop meat mixture onto buns

Enjoy!


Sunday 17 February 2013

Coconut Orange Muffins


Hey guess what? I've got another muffin recipe to share.

At one of the local bakeries they make the most amazing muffin. It is orange and coconut and so moist and amazing. Well last night I wanted one of those muffins, so I went on the hunt for a copy-cat recipe, and I found this one (and many others that sound amazing but not exactly what I was looking for). I liked the idea of throwing the whole orange in because I figured to get the amount of moisture and orange flavour it couldn't just be juice and zest. By the way, orange juice is definitely not orange. When you compare it to the colour of an actual orange pulverized in the food processor it looks so pale and yellow. Maybe it also has something to do with I was using Cara Cara's and they are incredibly dark and so so juicy and smooth.

It was really the perfect time to make these because it is right in the middle of 'specialty orange weeks' at the local grocery store. They have a least 8 different types of specialty, organic oranges that they specially bring in for only a couple of weeks a year. So, I had to buy a few different ones to sample.

I made this recipe just as it was written on food.com, but after this batch I might try and change things up a bit with some addition of some banana or pineapple or...we'll see. Big plans though. The first one of these I sampled once they had cooled tasted exactly like what I was going for. Unfortunately, once they rested overnight they didn't taste identical in the morning. But, they still were pretty good and very flavourful so I guess I can't complain.

One thing worth noting with this recipe is that they do not rise (at all). Nor do they melt down and spread out. What I'm trying to say is that if you have the batter all lumpy and uneven in the muffin tins, you'll pull the finished muffins out and they will have the same mountains and valleys that they did going into the oven. So, not the prettiest, but the coconut sprinkled on top helps and I'd recommend smoothing out the top of the batter in the tins gently with a spoon (I know, a big no-no with muffins, or so my Mom says).

Makes 12 muffins

Ingredients

1 Medium Orange (I used 2 small minus a few bites), seeds removed, with peel
1/4 C. Orange Juice
1/2 C. Coconut Milk (or OJ)
1 Egg
1/2 C. Butter, softened
1 3/4 C. Whole Wheat Flour
1/2 C. Shredded Coconut
3/4 C. Sugar
1 Tsp. Baking Powder
1 Tsp. Baking Soda
2 Tbsp. Shredded Coconut

Directions

~Preheat oven to 375 F
~Wash & slice orange and process in food processor until pureed 
~Add in OJ, milk, egg & butter and pulse until creamy
~In a separate bowl, combine flour, coconut, sugar, powder & soda.
~Fold in wet ingredients to dry.
~Scoop batter into greased or lined muffin tins.
~Sprinkle tops with coconut
~Bake for 20-22 minutes

Enjoy


Friday 15 February 2013

BBQ Chicken Pizza Wrap

You're probably thinking, not another wrap recipe! Just like you probably say the same thing when I post another muffin recipe. But bear with me, this was very, very good.

I regret to inform you that there is no picture for this post. The only explanation for this sad fact is that I'd worked all day, gone to the gym and then shopping and I was ready for dinner. And by ready, I mean I inhaled 3/4 of this and then my brain caught up and I thought, man that was really good, oh no I didn't take a photo of it. My exact train of thought. So here it is, I'm sharing it, because it was kinda a use up the leftovers sort of thing and so I don't know if or when we'll have the stuff to make it again. Meaning, I might forget to post it in the future, or even make it again if it's not in writing. So, I'm posting it now and hopefully it will remind me to make it again and take a picture. But seriously, I don't know how much of a loss it will be. Just go look back at any other post on here about wraps and this one will look basically identical. Except, it doesn't taste identical. It is so amazingly awesome in it's own unique way. I think it's the BBQ sauce. It sweetened it, whereas I usually try to add a bit of spice to my wraps.

After I finished eating it I realized that all the ingredients that I had thrown into this out of the fridge were actually the ingredients on our favourite type of pizza. So there you go. It made this wrap taste like a better dinner than some of my other wrap recipes that are more lunch tasting.

Makes 1

Ingredients

1 Soft Tortilla
1 Tbsp. BBQ Sauce
1/2 Chicken Breast, cooked & sliced
1/4 C. Pineapple, diced
Red Onion, sliced (to taste)
1/4 C Cheese, shredded
1/4 C. Peppers, diced

Directions

~Lay out all ingredients down the centre of the wrap.
~Roll up.
~Grill in panini press or grill until crispy on the outside. (If no grill available, you could microwave all innards before placing in wrap, to get a warm wrap with melty cheese).

Enjoy
 

Thursday 14 February 2013

General Tso's Sauce


So, I'm not that familiar with the flavour of General Tso's. I've only had it a few times and I have to admit that it was the sauce on a frozen dinner. So, I don't know if I really have anything to compare this to. It was good, not as strong as the one I can remember trying before, or so I thought. After I finished eating, I realized that maybe it did have a bit of a kick to it. Just a bit though. It did taste good though. It was mild enough that it didn't overwhelm the other flavours in what I was eating, it just added to them and complimented them. And it wasn't as sticky and sweet as the honey garlic sauce I made a few weeks ago. *Update* There was some leftovers of this and we tried it again the next night and agreed that there was a lot more flavour to it the second night. But still not an overpowering flavour that overwhelmed everything else you were eating. Just a good balance.

I think typically General Tso's is supposed to be on fried meat. Well, I typically tend to avoid fried meat (or fried things in general - unless you're talking about potato chips that is), especially when it calls for me doing it myself. So, we grilled the meat (or you could stir fry it) and topped it with the sauce afterwards. I personally think it tasted amazing as a sauce on our rice though. Way better than on the meat even.

Recipe from Chocolate Moosey.

Serves 4

Ingredients


2 Tbsp Sugar
2 1/2 Tsp Cornstarch

1/2 C. Stock
2 Tbsp Soy Sauce
2 Tbsp Vinegar
4 Tbsp Chili Sauce
2 Tsp. Oil

Directions

~In a small saucepan whisk sugar and cornstarch together. Add in the remaining ingredients and whisk continuously over medium-high heat until mixture begins to bubble and then thickens.

Enjoy


Wednesday 13 February 2013

Cheesy Italian Quinoa Bake

I've been looking forward to making this for a few weeks now and was happy to finally get around to it. I did kinda change it up a bit, and decided that the recipe I had, had some of the basics for an Italian Style Dish, so I went with it and this was what I ended up with. It has an incredible smell to it, but I didn't find that the flavour quite measured up to that smell. Everyone else who ate it said it was better than the Quinoa Mac & Cheese I made a week or so ago, but I had to disagree. All a matter of opinion though I guess. I was also told to stop with the quinoa for awhile, so oh well. 

Recipe adapted from Dinner, Dishes & Desserts who got it from The Healthy Apple.

Serves 8-10 people

Ingredients

1 1/2 C. Quinoa, uncooked
1 1/2 C. Water
1 1/2 C. Broth
3 Eggs
2 Tsp. Basil
1/4 Tsp. Sage
1 Tsp. Oregano
Salt
Pepper
6 Cloves Garlic, minced
1 1/2 C. Onion, diced
1 C. Tomatoes, diced
1 C. Mushrooms, diced
1 1/2 C. Mozzarella Cheese (I only had Aged Cheddar on hand), grated
2/3 C. Parmesan, divided
Marinara Sauce

Directions

~Rinse quinoa and cook in the water and broth in a saucepan until all the moisture has been absorbed. Allow to cool until it is just warm.
~Preheat oven to 375 F
~Meanwhile, whisk eggs in a large bowl.
~Season eggs with basil, sage, oregano, salt & pepper to taste, & garlic.
~When quinoa has cooled enough, mix into the egg mixture.
~Add onion, tomatoes, mushrooms, cheese and 1/3 C. Parmesan. Mix to combine.
~Transfer mixture into a greased 9"x13" baking dish. Sprinkle top with remaining 1/3 C. Parmesan
~Bake for 20-25 minutes or until top is golden and crispy.
~Serve by itself or topped with marinara sauce.

Enjoy


Tuesday 12 February 2013

Chocolate Malt Chocolate Chip Cookies


Well, I can finally check one thing off of my 'must-do' baking list. The list that narrows down my recipe file from about 1100 recipes to about 20 things. Why are these cookies so special, you might ask, well I can't honestly say. They are just different and I wanted to give it a go.

The only problem with these (and what took me so long to check off such a simple recipe from this list) was that malt powder contains milk ingredients. I can't make a cookie in our house that contains milk and not have some of another dairy free option available. But, every time I would make a normal chocolate chip cookie and then think I'll make these malted ones a few days later and have some overlap, well I turn around and the regular cookies are gone. Kinda like the last batch I made. The one who doesn't like chocolate or sweet things made the bag of them disappear. Hmm. He must have had some help.

Anyway, I've finally gotten around to them and I'm typing this up while the cookies are baking and so I don't know exactly what the finished product tastes like, but let me tell you the dough tasted pretty good. It was definitely different tasting than regular chocolate chip cookies. It had a lot more flavours to it and the malt made it taste nutty, so fingers crossed for the actual cookies. One thing though is that any cookie that seems to use shortening always bakes up very well.

So the final verdict on these is that they are pretty good (not my all time favourite, but definitely still worth eating) and don't taste too strongly of malt. A flavour that I had never tried up until buying the powder for this recipe and I was shocked to discover what it actually tasted like. Let me tell you, malted milk is not a hit in our house. But, these cookies don't taste like straight malt, they just taste good. So if you are looking for a strong malt presence I would suggest adding some more malt. I'm going to stick with it just how it is though, as it creates a very unique flavour.

Cookie recipe from Taste of Home.

Makes 5 dozen cookies

Ingredients

1 C. Golden Shortening
1 1/4 C. Brown Sugar
1/2 C. Malted Milk Powder
1 Tbsp. Vanilla
1 Egg
2 C. Flour
1 Tsp. Baking Soda
1/2 Tsp. Salt
1 C. Semi-Sweet Chocolate Chips
1/2 C. Milk Chocolate Chunks

Directions

~Preheat oven to 375 F
~In large mixing bowl cream together shortening and sugar. Add in the malt powder, chocolate syrup and vanilla, and cream.
~Add egg and mix well.
~Combine flour, soda and salt and mix in with wet ingredients.
~Stir in chocolate.
~Roll into balls and place on cookie sheets
~Bake for 9-11 minutes.

Enjoy


Monday 11 February 2013

Homemade Chocolate Syrup


This was so incredibly easy to make I can't believe that Nesquik is still even made. Like seriously people, try this yourself. You'll actually know what ingredients are in it and let me tell you, it's a very short list. I had to make this because a recipe I was planning on making (stay tuned for it) called for a couple of tablespoons of chocolate syrup. Well, I wanted to make this recipe now, not in a few hours, not tomorrow, you get my gist right? Plus, I didn't want to go spend $5 on a bottle of chocolate syrup that would then be placed in the cupboard and never used again. I guess I could have pulled out the last bottle that we bought that is still sitting in the cupboard. The only thing is, I can guarantee you that it is way, way, way too old to be consumed. I personally know it hasn't been used in at least three years and it probably sat in there for as many years before that. I know the expiry date has scratched off the lid it's so old. So why do we keep it you might be asking? Well, when I finish typing this up I think I'll march my way over to the pantry and get rid of it. Sounds like a plan.

Anyway, this is a little bitter as far as my likings go. If I were to be making this for an ice cream topping, etc. I probably would be increasing the sugar a little bit. But then again, I always have found chocolate syrup to be a bit bitterer than I like. So I guess this is pretty normal then. The one thing I do like about this recipe is that it can easily be scaled. The recipe I'm going to share makes about 1 1/2 C. of sauce. But because I only needed a couple of tablespoons, I easily was able to make only 1/3 of the recipe, and I didn't have to fiddle around with odd measurements. It just divided perfectly.

Recipe from Kitchen Treaty, who adapted from The Washington Post.

Makes 1 1/2 C.

Ingredients

1 C. Cocoa Powder
1 C. Sugar
1 C. Water
1/4 Tsp. Salt
1 Tbsp. Vanilla

Directions

~In a small saucepan combine cocoa and sugar and whisk to combine.
~Add in water and on medium-high heat bring to a boil, whisking constantly.
~Once on the boil, continue to stir for 3 minutes or until sauce thickens (it will thicken more once cooled).
~Stir in the salt.
~Remove from heat and stir in the vanilla.
~Allow to cool for it to thicken fully.

Enjoy and stay tuned for a recipe that you can use this sauce in.


Sunday 10 February 2013

Apple Pie Muffins with Chocolate Streusel


I decided to forgo making this as a loaf, and instead made it into muffins because they bake a lot quicker and you don't have to worry about cutting them, etc. They smell (and taste) like apple cider actually and the top is very good. I used mac apples and so they just sort of melted away into the muffin itself. Next time I may change it up a little and use some granny smith's because I like the tang of a green apple, and being a harder apple they'll probably leave some chunks once baked.

The one thing about this recipe that caught me off guard was that it required you to use an electric mixer. Not that I'm complaining at all, I love any excuse to use my KA, but it was actually a first for me, having to use a mixer for muffins I mean. Every other recipe I've used has called for either melted butter or oil and so no need to cream the butter like this one did.

I would recommend using a darker chocolate chip for this recipe. As much as I love milk chocolate in baking, I think the semi sweet chocolate paired well with the other flavours in this recipe. Also, I found the amount of streusel that is made is a bit too much for 12 muffins, but better a little too much than not enough right?

This recipe was adapted from Dinners, Dishes & Desserts who adapted from Mommy's Kitchen who originally got it from BHG Best Comfort Food Magazine. Whew, that's quite the reference there!

Makes 12 muffins

Ingredients

Streusel
1/3 C. Flour
1/3 C. Brown Sugar
1/2 Tsp. Cinnamon
Pinch of Nutmeg
3 Tbsp. Butter
3/4 C. Semi Sweet Mini Chocolate Chips

Muffins
1/2 C. Butter, softened
1/2 C. Sugar
1/2 C. Brown Sugar
1/3 C. Buttermilk
2 Tsp. Baking Powder
2 Eggs
1 Tsp. Vanilla
1/2 Tsp. Cinnamon
1/8 Tsp. All Spice
1/8 Tsp. Nutmeg
Pinch Ginger
1/2 Tsp. Salt
1 C. Whole Wheat Flour
1 C. All Purpose Flour
2 C. Apples, peeled & diced (2 medium apples)
1/3 C. Semi Sweet Mini Chocolate Chips

Directions

Streusel
~Combine all ingredients except the chocolate and mix with your fingers until it resembles a course meal (looks like sand).
~Add in the chocolate chips and mix to combine.
~Set aside

Muffins
~Preheat oven to 400 F
~In large mixing bowl cream butter and sugars until dissolved.
~Add in buttermilk and baking powder. Mix
~Mix in eggs & vanilla.
~Add spices, salt & flours and stir just until combined.
~Fold in the apples and the chocolate chips
~Spoon batter into greased (or lined) muffin tins
~Top generously with streusel topping.
~Bake for 5 minutes at 400 F, then decrease temperature to 350 F and bake for an additional 20 minutes.

Enjoy

Tuesday 5 February 2013

Easy Bean & Cheese Burrito


Okay, so yesterday I made practically this same wrap but with some meat and vegetables in it and I could just tell when eating it that the meat and vegetables were completely unnecessary in this wrap. So, today I made the simplest lunch I think I've ever made. I didn't even have to pull out a knife and cut anything. It was probably less than 5 minutes from start to finish.

Serves 1

Ingredients

1 Flour Tortilla
1/2 C. Refried Beans
1/4 C. Cheddar Cheese, shredded
1/8 Tsp. Cumin
1/4 Tsp. Chili Flakes

Directions

~Spread beans evenly across entire surface of tortilla
~Sprinkle with cheese, cumin & chilies
~Roll up jelly roll style (at the half way point fold in the sides then continue to roll)
~Place in panini press or grill until crispy on the outside.

Enjoy (probably with a side of veggies just to be healthy)


Monday 4 February 2013

Quinoa Mac & Cheese


This was good and will definitely be added to my make-again list. Even the one that hates anything to do with healthy, wholesome eating (aka eating quinoa) went back for seconds and ate it as a midnight snack as well. I feel this incredible sense of accomplishment for this.

The thing for me about quinoa is I've always liked the idea of it, but never really found anything I could make at home that tasted half decent. Until now that is. I think the answer may be as simple as cooking it in stock instead of water, or maybe just adding lots and lots of cheese to it. Cheese always makes anything better (or is that supposed to be chocolate?).

Recipe from Baking Serendipity who adapted from Monica Nelson Fitness.

Serves 6-8

Ingredients

1/2 Zucchini, chopped into small pieces (about 1/2-3/4 C.)
1 Medium Onion, diced
2 Garlic Cloves, minced
2 Tbsp. Oil
1 1/2 C. Quinoa, rinsed & drained
3 C. Chicken Stock
2 Eggs
1 C. Milk (we used unflavoured almond milk)
2 C. Aged Cheddar Cheese, shredded and divided
3/4 C. Parmesan Cheese, shredded and divided
1/2 C. Panko

Directions

~Chop vegetables and saute in oil in a large skillet until soft.
~Add in the rinsed and drained quinoa and saute for approximately 3 minutes.
~Pour in stock, stir and reduce heat and simmer until all the liquid has absorbed and quinoa is cooked.
~Meanwhile preheat oven to 350 F.
~In a large bowl, combine eggs, milk, 1 1/2 C. Cheddar & 1/2 C. Parmesan. Stir to combine.
~When quinoa is cooked, scoop into egg mixture and mix to evenly coat.
~Put mixture into a greased 9x13 baking dish (or to make individual versions, use muffin tins), sprinkle top with remaining cheeses and panko.
~Bake for 15-20 minutes or until top is crispy and golden and inside is hot.

Enjoy